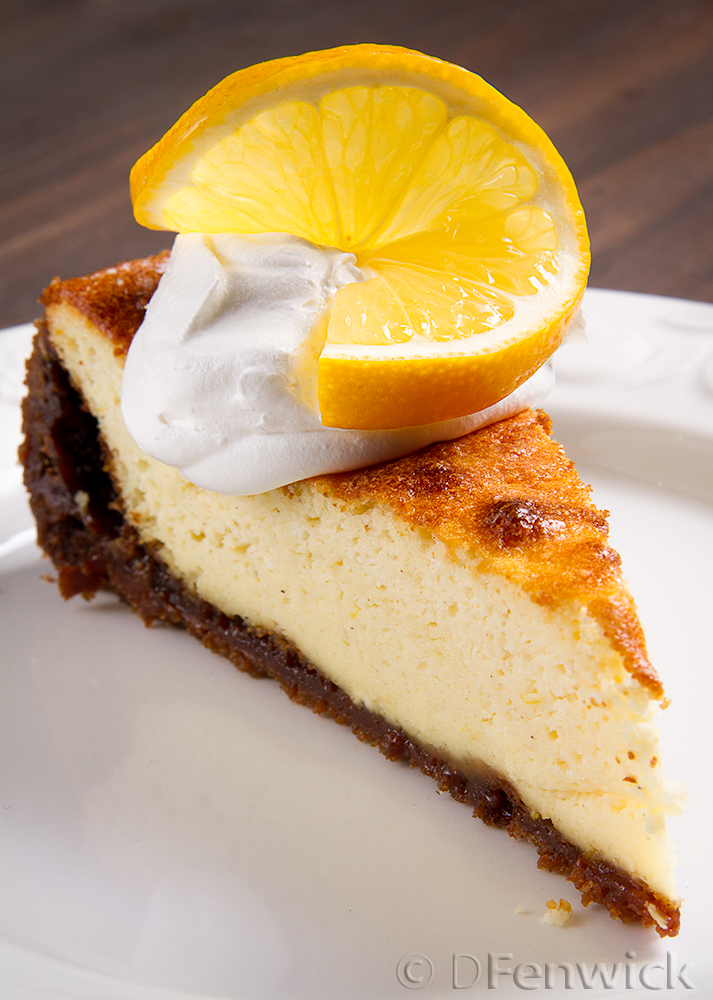
Adventures in Thyme

Our adventures in food

  • Home
  • Contact

Lemon Cheesecake

December 18, 2014 by Dan Leave a Comment

Lemon Cheesecake by D Fenwick, http://dfenwickphotography.com

Lemon Cheesecake

This week we bring you an ancient dish that is as drool worthy today, as it has been through the ages – the very decadent cheesecake!  While meandering through the fresh fruit at our local grocers some Meyer Lemons caught our attention, and somehow screamed “Cheesecake!” from their display.  Who are we to argue with citrus?!   So, whether it was serendipity, fruit fairies, or strung out holiday shoppers, please find below our inspired lemon cheese cake recipe:

Crust

13 oz. Gingersnap Cookies
1/2 cup Butter (1 stick) cut into pieces
1/2 cup Sugar
2 to 3 tablespoons Sugar for the pan

Filling

3/4 cup Sugar
16 oz. soft white Goat Cheese (Chevre)
1/2 Nutmeg grated (yes, 1/2 of a nutmeg, I grated mine with a micro plain)
3 tablespoons all purpose Flour
2 tablespoons corn starch
1/2 cup goat milk
6 egg yolks
zest of one large lemon
juice of 1/2 large lemon
6 egg whites

Preheat your oven to 350 degrees F.

Butter a 9-10 inch springform pan and dust with sugar (like you normally would flour a pan for baking).

Process the gingersnaps in a food processor until they are a course powder. Add in the butter and sugar and process until well blended. Press the mixture into the bottom of the springform pan and bake for 10 to 15 minutes. Remove from oven and let cool while you finish your filling.

Combine the sugar, cheese, vanilla, nutmeg, flour, corn starch and goat milk in a large mixing bowl. Stir to combine and break up the cheese into very small pieces. Add egg yolks one at a time and stir to blend until smooth. Set aside.

In a clean mixing bowl, beat egg whites until they form soft peaks. Be sure the bowl and beater are clean and dry or the eggs won’t beat properly.

Add the lemon zest and lemon juice to your filling and stir well. Gently fold 1/4 to 1/3 of the beaten egg whites into your filling mixture, by hand with a rubber spatula. Add another 1/4 to 1/3 and fold in, then fold in the remaining egg whites. This should make a relatively light batter. Be sure to fold in the egg whites, do not beat or mix.

Pour your filling into your springform pan and place on the center rack of your oven. Bake for approximately an hour or until the batter is mostly set. It may still be a little jiggly in the middle. Remove from the oven and gently run a butter knife around the edge of the cheesecake to loosen it from the edge of the pan.

Cool and serve with whipped cream and a slice of lemon.

Filed Under: Photo, Recipe Tagged With: cheesecake, chevre, dessert, goat cheese, goat milk, lemon

Pumpkin Pie

November 26, 2014 by Dan Leave a Comment

Pumpkin Pie by D Fenwick, http://dfenwickphotography.com

Pumpkin Pie


Tonight’s recipe is all about getting the kids to eat their vegetables.  You shouldn’t have much trouble – pumpkin pie is so deliciously silky and spiced with the  flavors of Fall – cinnamon and nutmeg.  Okay, so we’re kidding ourselves if we think it’s “healthy” but it IS a vegetable.  Let’s make some pie!

This recipe makes two deep 9 inch pies or three shallow 9 inch pies or three deep 8 inch pies.

2 cups Sugar
1 tablespoon Flour
1 1/2 teaspoons Salt
1 teaspoon ground Ginger
1 tablespoon ground Cinnamon
1 tablespoon ground Nutmeg
1 quart Milk (or substitute – almond milk, soy creamer, etc.)
1 large can Pumpkin (about 3 cups)
1 teaspoon Vanilla
3 tablespoons melted Butter
4 eggs

Pie crust for two 9 inch pies (three for shallow 9 inch or deep 8 inch pans)

Preheat your oven to 350 to 400 degrees F. (For my oven it needs to be 400.)

Mix together the dry ingredients; sugar, flour, salt, ginger, cinnamon and nutmeg.

In a large mixing bowl, beat 4 eggs. Combine the dry ingredients, pumpkin and wet ingredients by alternating their addition into a mixing bowl.  Specifically by starting and ending with dry ingredients, about a quarter of each ingredient with each addition. Stir together well as you add each part. Once the ingredients are well mixed, add the vanilla and butter.

Place your crust in the pie pans. Fill each pie with the filling, keep the filling about equal so they will cook evenly.

Cook on the middle rack of your oven until the custard is set in the middle. Start checking at about 60 minutes. On my oven it takes about 80 minutes for the deep 9 inch pies to cook.

Serve with whipped cream.

Filed Under: Photo, Recipe Tagged With: Christmas, dessert, pie, pumpkin, Pumpkin Pie, Thanksgiving

Apple Custard Pie

November 5, 2014 by Dan 1 Comment

Apple Custard Pie by D Fenwick, http://dfenwickphotography.com

Apple Custard Pie

Can there be too many apple pie variations?  We think not, so here’s another spin on this all American dish. This time we use  almond milk custard and tart Granny Smith apples to make an apple custard pie.

4 to 5 cups sliced green, tart Apples (Granny Smith work well)
2 cups plain, unsweetened Almond Milk
4 eggs
1 teaspoon Vanilla
1/2 cup Brown Sugar
2 table spoons Corn Starch
2 teaspoons Cinnamon
1/4 teaspoon Salt
9 inch Pie Shell

Preheat your oven to 350 degrees.

Place your pie dough into a 9 inch pie pan, line with parchment and something to weigh it all down as it bakes. We used a bags worth of kidney beans that we had in the cupboard. Bake the pie shell for 20 to 25 minutes or until done. Remove from the oven and let cool (and throw out the beans if you use some too – although edible, they’ve lost their yummy factor in the baking process).

Peel, core and slice your apples.

Combine all of the dry ingredients, mixing completely.

Put the almond milk in a 6 to 8 quart pan. Beat your eggs and add them to the almond milk. Add your dry ingredients and mix until combined and the sugar is dissolved. Add your apples. Cook over medium heat until it just begins to bubble. Turn down to low and cook, stirring frequently until well thickened and the apple slices are soft (about 20 minutes or so).

Pour the apple custard mixture into your pie shell and refrigerate until cool. Serve with whipped topping and a dusting of cinnamon.

Enjoy!

Filed Under: Photo, Recipe Tagged With: apple, Custard, dessert, pie

Peeres in Confyt

October 22, 2014 by Dan 1 Comment

Pear in Wine Sauce by D Fenwick, http://dfenwickphotography.com

Pear in Wine Sauce

This week it’s another trip through time. Dan was asked to shoot a cover for the Society for Creative Anachronism’s quarterly magazine, Tournaments Illuminated. The nice people at Medieval Cookery very kindly allowed us to use the Peeres in Confyt recipe for the cover photo and have given us permission to post it here. You can find this and many other fun historical recipes on their web site at medievalcookery.com

The original recipe is from Forme of Cury, S. Pegge (ed.):

PEERES IN CONFYT. XX.VI. XII. Take peeres and pare hem clene. take gode rede wyne & mulberes oþer saundres and seeþ þe peeres þerin & whan þei buth ysode, take hem up, make a syryp of wyne greke. oþer vernage with blaunche powdour oþer white sugur and powdour gyngur & do the peres þerin. seeþ it a lytel & messe it forth.

The redaction we used is:

4 pears
3 cups red wine
water (for poaching)
2 cups sugar
1/2 tsp. ginger

Peel pears, leaving the stems on, and cut a small amount off the bottoms so they will stand upright. Poach in water flavored with one cup of wine. Remove pears from water when they are just tender and place upright in a serving bowl. If desired, slice each pear in halves or quarters leaving about a half inch from the top uncut so the parts will remain attached. Make a syrup of remaining wine, sugar, and ginger. Bring syrup to a boil, reduce heat and allow to simmer. Pour syrup over pears and serve hot.

This is really a very easy recipe and is quite good. It would be perfectly at home on the table for your holiday parties, Thanksgiving or Christmas dinner.

Explore history through food and have a little adventure in time!

Filed Under: Photo, Recipe Tagged With: dessert, medieval, pears, wine

Date Bars

October 9, 2014 by Dan 1 Comment


Date Bars by D Fenwick, http://dfenwickphotography.com

Date bars


If you ever crave a crumbly and gooey dessert, this Date Bar recipe is for you.  It would be excellent paired with a scoop of vanilla bean ice cream,  and since the glaze can do double duty on the ice cream too – it’s a win win!  Let’s get cooking…

Filling

3 cups chopped dates (you can find these prepackaged in the baking aisle)
1/2 cup sugar
3/4 cup water

Combine the dates, sugar and water in a small sauce pan. Cook over low to medium low heat, stirring frequently, until it starts to thicken and is bubbly (20-25 minutes).  Remove from heat and let cool.

Dough/Crumbly bits

2 cups flour
3 cups quick cooking oats
1 1/2 cup brown sugar
1 teaspoon baking soda
1/2 teaspoon salt
1 teaspoon cinnamon
1 cup vegetable oil

Preheat your oven to 325 degrees F. Grease one 9×13 or two 9×9 baking pans. (The 9×13 makes thicker bars.)

Combine the dry ingredients, mix well. Add the oil and stir to combine. This will make a very crumbly dough.

Press 2/3 of the dough into the baking pan(s). Spread the cooled filling evenly over the top. Place the remaining dough on top of the filling and pat it down evenly.

Place on the middle rack in the oven and bake 30 to 35 minutes (25-30 for 9×9).

Remove from oven and let cool. Cut unto 2 x 2 inch bars.

Glaze

1 cup brown sugar
1/4 cup butter
1/4 cup heavy cream
1 teaspoon vanilla

Place ingredients in a sauce pan and cook over medium heat, stirring periodically. (Don’t let it stick to the bottom or burn.) Bring to a boil and boil, whisking constantly, for 3 or 4 minutes. It will thicken a bit. Let cool to warm and drizzle over the top of your date bars. Serve yourself a delectable sized portion and enjoy the fruits of your labor.

Filed Under: Photo, Recipe Tagged With: Bars, Cookies, Date, dessert, Sweets

  • « Previous Page
  • 1
  • …
  • 3
  • 4
  • 5
  • 6
  • 7
  • 8
  • Next Page »

Recent Posts

  • Hard Cider Brittle
  • Jalapeno Artichoke Dip
  • Beef and Pasta in Red Sauce
  • Steak – One Pan Meal
  • Grain Free “Strawberry Shortcake” Cookies
  • Meatballs with options for everyone at your party
  • Chicken for game day
  • Spaghetti with sliced beef
  • Baked Salmon in Puff Pastry
  • Christmas Dessert for Two

ARCHIVES

  • November 2016
  • June 2016
  • May 2016
  • March 2016
  • February 2016
  • January 2016
  • December 2015
  • November 2015
  • October 2015
  • September 2015
  • August 2015
  • July 2015
  • June 2015
  • May 2015
  • April 2015
  • March 2015
  • February 2015
  • January 2015
  • December 2014
  • November 2014
  • October 2014
  • September 2014
  • August 2014
  • July 2014
  • June 2014
  • May 2014
  • April 2014
  • March 2014
  • February 2014
  • January 2014
  • December 2013
  • November 2013
  • October 2013

Categories

  • Cooking Information
  • Event
  • Photo
  • Recipe
  • Recipe Modifications
  • Restaurant

Meta

  • Log in
  • Entries feed
  • Comments feed
  • WordPress.org

Copyright © 2025 · Foodie Child Theme by Shay Bocks · Built on the Genesis Framework · Powered by WordPress