By any other name would taste as yummy. Bacon – it’s all the rage, but was it ever not? Today we’re actually cooking with its close relative – Pancetta. Typically, bacon and pancetta both come from pork belly and are cured, but bacon is cold-smoked while pancetta remains au natural. The flavors of each are distinct, but can easily be interchanged one for the other.
Let’s be frank tho, who the heck cares?! Once either starts frying in your pan you’ll soon have a crowd in the kitchen sniffing around like bloodhounds. Let’s cut the chatter and rattle some pots and pans with Roasted Brussels Sprout Farfalle with Pancetta.
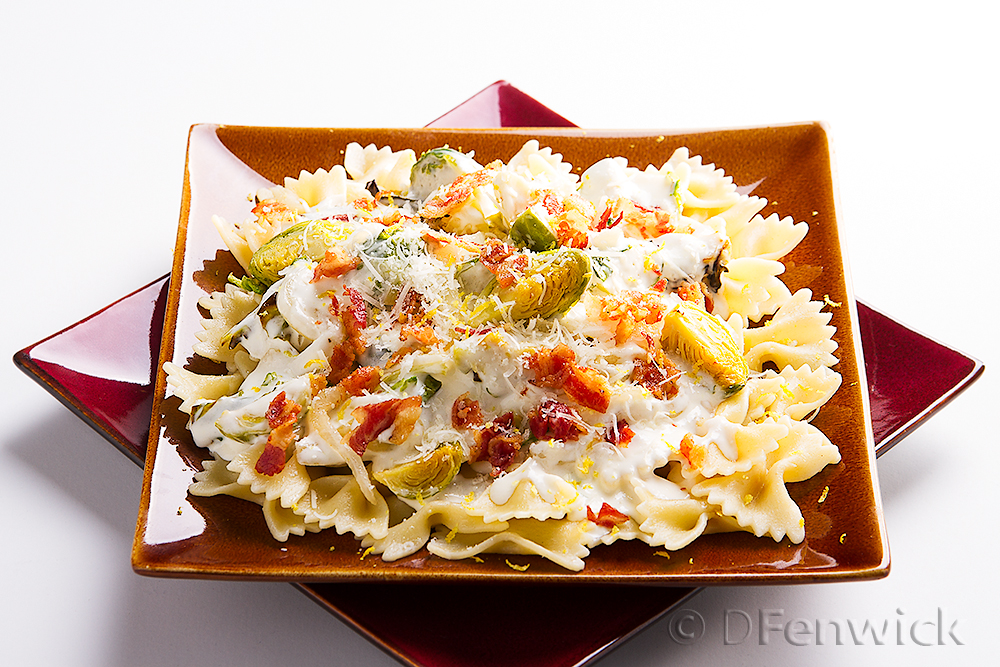
Roasted Brussel Sprouts Farfalle
You will need:
1 box of Farfalle pasta (also packaged as “bowtie pasta”)
~ 4 Pancetta slices – slivered (if your grocery store’s deli does not have pancetta you can normally find packaged pancetta in the refrigerated section with specialty deli meats and cheeses)
1 lb of Brussels Sprouts (or about 1/2 lb per person) cleaned and sliced into quarters
1/2 sweet onion – sliced (or a shallot if you are not fond of onions)
1 garlic clove – chopped
1 tsp of Extra Virgin Olive Oil
1.5 cups of heavy whipping cream
1 cup of shredded pecorino cheese (or parmesan if you prefer)
1 lemon – zested
salt – to taste
1. Heat your oven to 425 degrees F and prepare a baking sheet with parchment paper; in lieu of that you can use an oven safe oiled pan.
2. Put ~ 1 tsp of oil in a fry pan and fry the pancetta slivers. You are accomplishing two things (1) Making the crumbles for the top of the dish AND (2) drawing out the pancetta flavor/oil for the onions and brussel sprouts. Keep stirring the pancetta until they are brown and crispy (but not Bacos!), carefully remove the pancetta but not the oil and layer the crumbles on a paper towel.
3. Into this hot pan (with the pancetta oil) fry the onions until they begin to soften, now add the brussels sprouts and continue to cook 5-8 minutes. The sprouts will turn a vibrant green. Keep stirring. The onions should now be translucent or close to it. Add the garlic and stir a few more minutes. Carefully spoon the mixture onto your prepared oven pan – try not to spoon out any extra grease (but there really shouldn’t be much in there; it should be coating your veggies). Place in your oven and cook about 20 minutes or until the brussels sprouts are tender – they still have “body” but they aren’t crunchy. Also, set aside your fry pan to use for the sauce later.
4. While the sprout mixture cooks in the oven start a pot of water to boil for the farfalle, and cook it. Reserve ~ a cup of pasta water for possible use later.
5. While the farfalle and veggies are cooking, pour the 1.5 cups of heavy cream and cup of pecorino back into the fry pan and bring the temperature up – do not boil this, just a nice slow heat until the cheese is incorporated and the sauce thickens. If it gets too thick use some of the pasta water to thin it out.
6. When the farfalle is al dente pour thru a strainer and add the pasta to the sauce. When the brussels sprouts are tender add this to the sauce and noodles, mix gently.
7. Serve with pancetta crumbles and lemon zest. Enjoy!
Finally, and without further ado: What’s the name of a movie about bacon?
Hamlet of course!