Adventures in Thyme

Our adventures in food

  • Home
  • Contact

Sprout a little happiness

January 23, 2014 by Ginger Leave a Comment


Sprouts

Sprouts

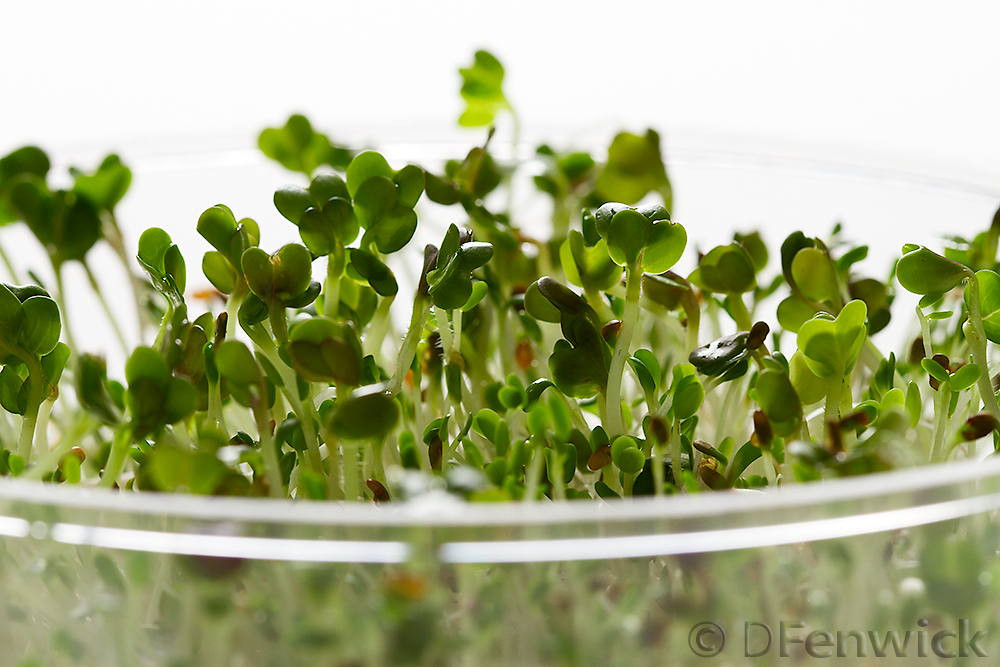
Aren’t they cute?  Admit it, you can hear this little collective chanting “Eat me!”.   Grown in my kitchen without the need of seasonal consideration, soil, or even sunshine, these little sprouts have a destiny with my tummy, and a recipe that is as beautiful as it is tasty.

If you aren’t yet ready to be a sprout wrangler yourself, head on down to your local grocery store and pick some up, then scroll down for a wee bit of happiness on a plate.
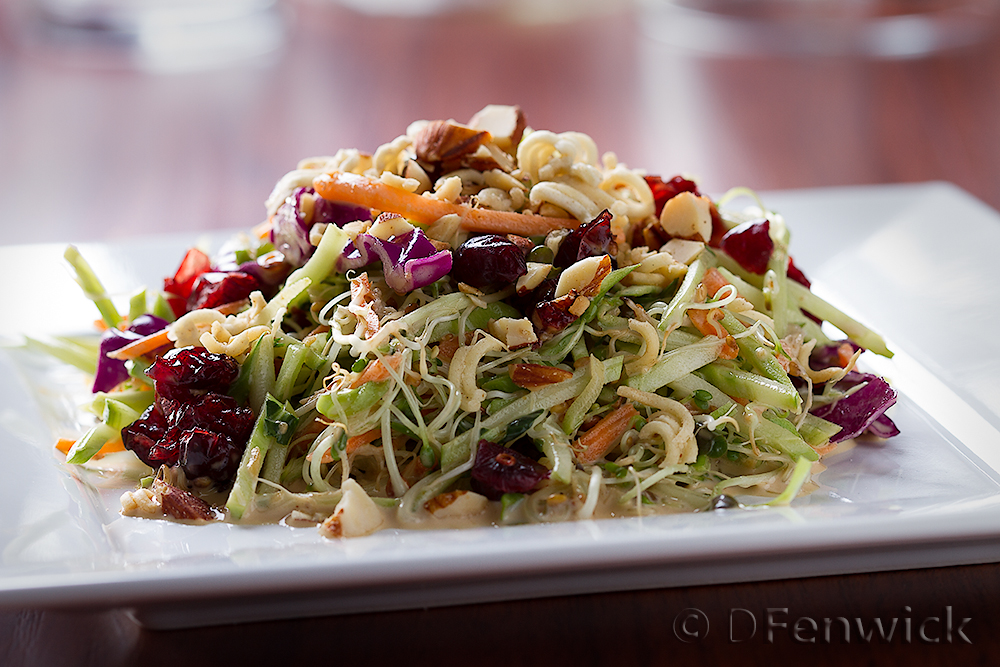
Broccoli Slaw Salad

Broccoli Slaw Salad

This salad has three parts: Salad, Dressing, Topping.

For the Salad:  You’ll need sprouts and  broccoli slaw. Broccoli slaw can be found in your local grocery store, veggie department, precut and bagged in the refrigerated area of the veggie section.

For the Topping:  Chicken Ramen (yes those $1 a bag little dried ramen soups), dried cranberries and chopped raw almonds.

Open the ramen, take out the soup mix packet, and place the ramen in a zip lock baggie.  With a rolling pin, can of soup, or just your fingers, crush the ramen into little bits – don’t pulverize it into dust, just little crumbly bits.  Heat a pan with a small pat of butter and add said crumbly bits and the chopped almonds.   Stir well and cook until browned – you don’t want to overcook the noodles, and the heat will bring out more flavor in the almonds as they toast.  Place this mixture onto a plate or cookie sheet lined with paper towels so the noodles stop cooking and any excess butter comes off.

For the Dressing mix altogether:
1/4 cup soy sauce
Juice of 1 lemon
~1/2 cup of Mayo
2 Tablespoons of freshly grated ginger
2 Tablespoons of apple cider vinegar
2 Tablespoons of brown sugar
1 Teaspoon of dark sesame oil (normally found in the Asian section of the grocery store)

Now it’s as easy as assembling your salad.  Because the dressing will separate when stored in the fridge, I make a small salad portion at a time instead of mixing everything and storing it “pre made”.   So with that in mind, mix sprouts, slaw, cranberries and some dressing in your bowl, then sprinkle on your topping and enjoy!  As I mentioned, the dressing will separate when stored in the fridge, just stir it well each time before you use it, it’ll keep about a week.

Isn’t it yummy? When it comes to sprouts, and sprouting your own, you’ll soon discover that resistance is futile, you will be assimilated.


Filed Under: Photo, Recipe Tagged With: broccoli, dressing, salad, slaw, sprouts

Souper Comfort Food

January 15, 2014 by Ginger Leave a Comment

Potato Soup

Potato Soup

It’s amazing how a humble little root evokes such memories of bygone days.  When I was little and Dad travelled out of town or was late coming home, Mom would promise us “the special dinner”.  No matter how much we begged, we only got it when Dad was gone.  It was almost torture waiting…waiting for Dad to leave so we could have the most wonderful of all dinners – potato soup.   And once “the special dinner” had been declared it meant we were taking a drive in our blue 1960s Chevy Stationwagon to the store for fresh sourdough bread.  Mom would always let us rip off the ends and chew on them as we drove home, it was glorious.  We had no seatbelts to restrain our enthusiasm as we giggled and tumbled around the back of that old wagon heading home to soup!  Egads, a wonder we survived childhood!

Little did we know that “the special dinner” was special to Mom too.  It’s a no fuss, easy peasy recipe that she could throw together easily.  A perfect meal that allows plenty of time to relax after a long day.  It takes 4 ingredients: water, potatoes, dehydrated onions, evaporated milk.  That’s it.  Let’s get cooking!

Dice your potatoes in bite sized squares.  I gauge the amount needed by about one potato per person.  Try to dice evenly so they’ll cook uniformly.  Place in a pot and add water about 1″ inch over the top.  Sprinkle the dehydrated onions on – more if you like onions, less if you don’t.  Bring to boil.  Add a little more water if the water boils down to the potato tops.  After about 15 mins or so see how “fork tender” the potatoes are.  Are they still too crunchy?  Soft enough for you?  Keep boiling if you’d like them softer, but once they are as tender as you like, decrease down to medium and add a can of evaporated milk (one can for 1-3 potatoes, more cans as needed).  Once the soup has almost reached a boil, it’s ready.  At this point, you can add a pat of butter, a pinch of garlic salt, a slice of sourdough bread, whatever suits you.  Now sit back, relax, and ponder memories of childhood.  How sweet they can be.  🙂


Filed Under: Photo, Recipe Tagged With: Dinner, evaporated milk, lunch, potato, soup

Balls fit for a King

January 8, 2014 by Ginger 3 Comments

Teriyaki Meatballs with fried Quinoa

Teriyaki Meatballs with fried Quinoa


Here’s a tasty little dish sure to please even the fussiest of eaters.  How you might ask?  A sweet little sauce called Teriyaki that will cast it’s spell upon even the humblest of meatballs or persnickety “royal” taste buds.  Our recipe is quick and easy, so let’s get cookin’!

Set your oven to 400 degrees F and line a baking sheet with parchment paper.  You’ll be placing this in the middle rack of your oven for even cooking.

For the Balls:

1lb Ground Beef (we use 10% lean)
1/2 cup Panko (we use finely smooshed Corn Flakes)
1/2 cup Water Chestnuts (finely chopped)
1 egg
2 Green onions (finely sliced)
2 Tablespoons teriyaki (recipe below)

Mix together well.  I recommend using your hands – your going to be rolling balls so might as well get your pinkies in there from the get go!  After you’ve mixed all the ingredients, start rolling approximately 2″ diameter meatballs and place evenly spaced on your baking sheet.  These will bake in the oven about 30 mins.  Take one out and cut in half, if it’s cooked thru remove the baking sheet, or add more time as needed.

Place the meatballs into a clean bowl and mix with some prepared teriyaki – enough to cover them in sweet glaze, perhaps 1/4 cups or so, add more as needed, and serve.  For a spicier glaze you can also reserve some of the teriyaki in a smaller bowl and add Sriracha sauce.  Mix well and use for dipping, if you dare…

For the ‘Yaki:

1 cup Soy Sauce
1 Cup Sake
1/2 Cup Mirin (found in the Asian product aisle of the grocery store)
1/8 Cup (4 Tablespoons) Sugar
1/8 Cup Honey
1/2 Teaspoon Ground Ginger
1/2 Teaspoon Granulated Garlic
1/2Teaspoon Granulated Onion
3 Tablespoons Corn Starch

In a small pot combine all ingredients and bring to a boil over medium high heat, stirring often while heating and constantly as it boils, until it thickens.  Remove from heat and cool.  Store in your refrigerator.

So there you have it, dinner in about an hour and the only argument will be who has the most.

“Balls” cried the Queen, “If I had two, I would be King!”
And The King laughed because he had to!

Filed Under: Photo, Recipe Tagged With: beef, Dinner, meatballs, teriyaki

Say Cheese!

January 2, 2014 by Ginger Leave a Comment

Mascarpone and crackers

Mascarpone and crackers

Happy New Year!  Have you made your resolutions?  Me too.  Let’s throw them out the window and begin 2014 making homemade mascarpone.  Yes, it’s fattening, but who the hell cares?!  We don’t need no stinkin’ diets!  Bring on the curds…

This recipe is marvelously easy, all it takes is 1 quart of half n’half (do not get ultra-pasteurized), tartaric acid and a fine strainer or cheesecloth.  You can substitute this acid with lemon juice, but if you have a brewing store in town, definitely make the journey to your local purveyor of booze-making equipment and support your neighborhood retailer.  You might find your first new hobby of 2014.  If you do go to a brewing store, check out the supplies of netted bags used in brew making, these also work wonderfully to strain curds and they are relatively inexpensive.

To the recipe: In a double boiler, bring the milk slowly to temperature, about 173 degrees F, then turn down the temperature to low.  Gently sprinkle a generous 1/4 tsp of the tartaric acid over the milk and stir gently with a whisk – these curds need TLC!   You should begin to see the whey (greenish liquid) and the curds separating.  As the pot begins to thicken with curds, I remove from the heat and let it sit about 8-10 minutes, then carefully spoon into a prepared strainer and cheesecloth.  Once you see that the whey is no longer dripping from the strainer (maybe 15 mins), you can add your salt.  Then it’s up to you whether this mascarpone needs herbs and garlic, OR cinnamon and sugar, that my friends, is up to your tastebuds.

Enjoy!

Mascarpone - warming the half and half

Mascarpone – warming the half and half

Mascarpone - curds

Mascarpone – curds

Mascarpone - curds

Mascarpone – curds

Mascarpone - spooning the curds into cheese cloth

Mascarpone – spooning the curds into cheese cloth

Mascarpone - after straining out the whey

Mascarpone – after straining out the whey

Mascarpone, half and half and whey

Mascarpone, half and half and whey

Filed Under: Photo, Recipe Tagged With: cheese, mascarpone, recipe

I’m Dreaming Of A…

December 25, 2013 by Dan Leave a Comment

Dream Bars

Dream Bars


Forget about a white Christmas – From our home to yours, a Merry Christmas!

Our gift to you is another look into the old family recipe box – Dream Bars! We have no idea how old this recipe is or what its origin was, but it’s older than either of us. It’s a nice bar cookie with a crust that is almost a brown sugar shortbread.  So yummy, it’s more than worth your time in the kitchen.  Roll up your sleeves, it’s time to start Dream-ing.

Dream Bars

1/2 Cup Butter cut into small pieces
1/2 Cup Brown Sugar
1 Cup Flour

Mix until crumbly (A pastry blender works well or you can pulse the mixture in our food processor)

Pat into a greased and floured 9 x 13 inch baking pan. Bake at 350 degrees F for 10 minutes.

While the above bakes make the topping.

2 Eggs, beaten
1 Cup Brown Sugar
1 Teaspoon Vanilla
2 Tablespoons Flour
1/2 Teaspoon Baking Powder
1 1/2 Cup Coconut Flakes
1 Cup chopped nuts (Pecans work well)

Mix these together in the order given. Gently spread onto the baked crust.

Bake another 20 minutes at 350 degrees F. Let cool before attempting to cut these out of the pan.

Filed Under: Photo, Recipe Tagged With: bar cookie, cookie, recipe

  • « Previous Page
  • 1
  • …
  • 19
  • 20
  • 21
  • 22
  • 23
  • 24
  • Next Page »

Recent Posts

  • Hard Cider Brittle
  • Jalapeno Artichoke Dip
  • Beef and Pasta in Red Sauce
  • Steak – One Pan Meal
  • Grain Free “Strawberry Shortcake” Cookies
  • Meatballs with options for everyone at your party
  • Chicken for game day
  • Spaghetti with sliced beef
  • Baked Salmon in Puff Pastry
  • Christmas Dessert for Two

ARCHIVES

  • November 2016
  • June 2016
  • May 2016
  • March 2016
  • February 2016
  • January 2016
  • December 2015
  • November 2015
  • October 2015
  • September 2015
  • August 2015
  • July 2015
  • June 2015
  • May 2015
  • April 2015
  • March 2015
  • February 2015
  • January 2015
  • December 2014
  • November 2014
  • October 2014
  • September 2014
  • August 2014
  • July 2014
  • June 2014
  • May 2014
  • April 2014
  • March 2014
  • February 2014
  • January 2014
  • December 2013
  • November 2013
  • October 2013

Categories

  • Cooking Information
  • Event
  • Photo
  • Recipe
  • Recipe Modifications
  • Restaurant

Meta

  • Log in
  • Entries feed
  • Comments feed
  • WordPress.org

Copyright © 2025 · Foodie Child Theme by Shay Bocks · Built on the Genesis Framework · Powered by WordPress