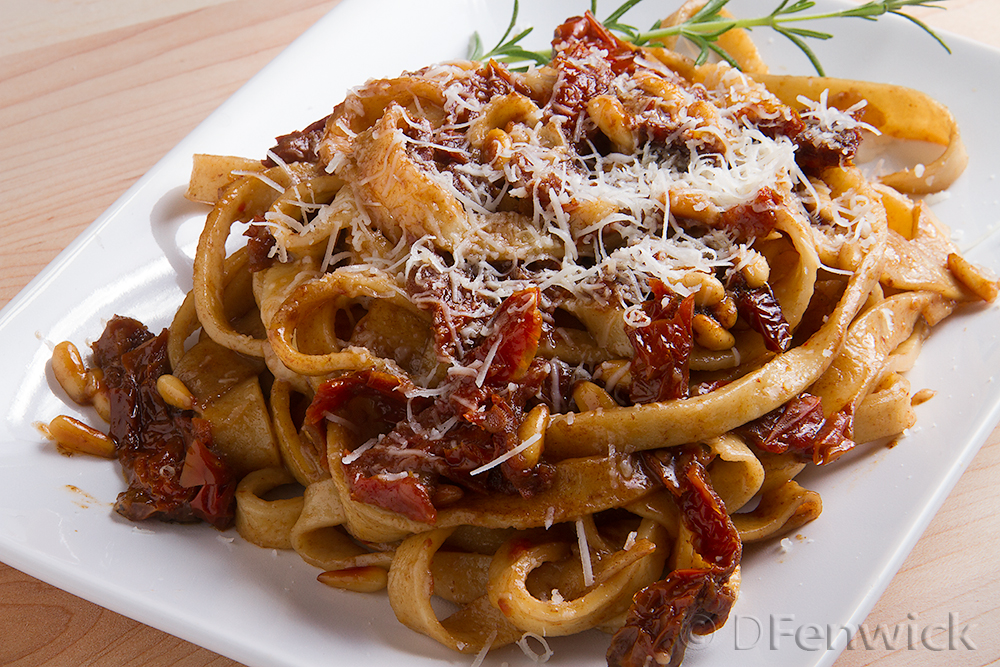
Tomato Balsamic Pasta
Each of us have a “Mt Everest” on our cooking bucket list. Maybe it’s proofing the perfect sourdough bread, or recreating Mom’s Chicken Curry. Tonight we are happy to proclaim that we have climbed our mountain and have made pasta. Great pasta too! And are addicted to it’s fresh homemade yumminess.
We’ll start by making the pasta.
2 cups all purpose Flour
3 Eggs
1/2 teaspoon Oil (I used olive oil)
1/2 teaspoon Salt
cold water
Make a mound of flour in the middle of a good sized cutting or pastry board. Make a nice hollow in the middle. Place your eggs, salt and oil in the hollow. Start blending with a fork, pulling flour in as you go. Once I had a good amount of the flour blended in, the fork didn’t work so well, so I went to using my fingers. If the dough is dry, add cold water a little at a time. I ended up adding about 1/4 cup of cold water. Once you have a nice dough, kneed with your hands for about 10 minutes, until it is nicely elastic. Wrap in food wrap and let rest for 20 minutes or so.
Divide the dough into quarters. (Keep the pieces you aren’t using wrapped up so they don’t dry out.) Flour your hands, a pasta board and either a rolling pin or pasta machine. On the floured board, press out one of the balls of dough into a flat circle or oval. Using a rolling pin or a pasta maker, roll out the dough as thin as you can get it. If using a rolling pin, be sure to move the dough around to be sure it isn’t sticking. Roll from the middle out. Lay the pasta sheets out on a cookie sheet and cover with a piece of food wrap. Leave a piece of the food wrap between each sheet. (At this point, you can refrigerate the dough for a day or two, just keep them covered.) Once they are all rolled out, cut into thin strips.
For the sun dried tomato and balsamic pasta, you will need
Pasta (the entire batch above will feed 4 to 6 adults)
2 oz. Pine Nuts
1/2 to 3/4 cup sliced Sun Dried Tomatoes
1/2 cup good Balsamic Vinegar
1/2 cup White Wine
1 cup grated Pecorino Cheese (You can also use Parmesan cheese)
reserved pasta water
Salt
Pepper
Olive Oil
Bring a large pot of water to a boil, be sure to salt it and add a couple tablespoons of olive oil. Add the pasta to the water and boil for about 5 minutes (at my altitude it took between 7 and 8 minutes for the pasta to cook.) Do not drain the pasta.
As you bring the water up to a boil, take a large skillet and place it on the stove at medium heat. Once the pan is hot, add the pine nuts. stir them around regularly to toast them evenly. They can burn quickly so keep watch and stir often. Add the sliced sun dried tomatoes and a tablespoon of olive oil (you can use the oil the tomatoes were packed in.) Stir to get the tomatoes hot and let them just begin to color. At this point your pasta should be ready, if not, remove this from the heat until the pasta is cooked. Add the balsamic vinegar and let it reduce a little, stirring for a minute or so. Add the pasta, straight from the pot. Stir to combine. Add the white wine and cook, stirring constantly. Once the wine is boiling nicely and everything is blended together, add the grated cheese and stir to combine. Add a ladle or so of the pasta water. Stir while it simmers for a couple minutes. The sauce should thicken a little and will coat all of the pasta.
Serve hot and top with a little more grated cheese. Salt and pepper to taste.