
Cha Siu Bao
Realtors like to remind potential homebuyers in the area “You’re only 4 hours away from San Francisco!”, which might be awesome if you want to smell some sea air every now and again, but if you’re a Dim Sum aficionado, 4 hours is WAAYY too long to wait to eat your way thru Chinatown during Dim Sum serving hours.
So today is our little ode to those pillowy buns of goodness and the succulent Char Siu hidden within. I’m salivating already, let’s get cooking!
Tip: The “easy” route for these buns is to forego cooking the Char Siu part yourself and just buy some cooked slabs ‘o char siu at your local grocery store. Many now have in-house Chinese takeaways that sell fairly good char siu. If you want to make it yourself, that recipe is at the end. Part 1: The dough Part 2: Filling Recipe w/ Store-bought Char Siu Part 3: Filling Recipe w/Homemade Char Siu
Part 1: The dough:
Prepare a large bowl with a tiny bit of vegetable oil swirled around the inside. Set aside for the dough to rise in later.
Place 1 cup of whole milk in microwave for ~25 seconds and have a thermometer standing by. The milk CANNOT get hotter than 95 deg F. If your temperature is under 95 F stir in (1) tsp sugar and (1) tsp of Active Dry Yeast (I use Fleischmann’s -This is not the whole packet, it’s only 1 tsp).
Place the cup of milk back into the microwave (where it’s warm) and let it sit for about 15 mins or until it gets nice and bubbly.
While the yeast is having its way with the sugar, into a large mixing bowl sift:
2 cups all purpose flour
3 tsp sugar
When the yeast mixture is bubbly add this to the flour mixture AND 2 tsp vegetable oil (canola works too). Mix ’til combined then pour out onto a floured flat surface.
Knead for about 5-8 mins. It shouldn’t be super sticky, add a little more flour as you knead if it is.
Once the dough ball is holding a round plump form, place into the oiled bowl to rise. Take a clean dishtowl, wet with water and then tightly wring out all the water (use your elbow grease – I mean ALL the water). Place this directly on top of the dough, covering it all around, then cover the bowl with plastic wrap. If your microwave is still warm you can place this bowl in it OR you can place the bowl in your oven with the light on (but do not turn on the heat). You just want to keep the yeast warm but not hot.
The dough needs to rise for about an hour, but if it doubles a little earlier, or a little later, it’s all good. You just want a nice rise to the dough indicating that some yummy fermentation has taken place – this will give the cooked bao that signature tart smell.
Place the dough back onto a clean and lightly floured board and with a rolling pin, gently roll out the dough then fold into thirds. Roll this back into a ball, then roll out gently one last time, folding into thirds. Cut into 8 (or 9) even pieces and recover with your dishtowel or plastic wrap. You’re now ready to add the Char Siu.
Part 2: Filling Recipe
Make sure your pot of water is heating on the stove and your steamers are ready to go!
Into a bowl mix:
2 Cups of evenly cubed strips of Char siu (these are less than bite sized, they’re small)
3/4 tsp Honey
1 tsp Sesame Oil
1 Tablespoon Hoisin
1 Tablespoon Thick Soy Sauce (I’ve only ever seen it in an Asian Market, looks like molasses)
Mix well. Depending on the moisture of your char siu, if this looks too dry, add a bit more hoisin.
Now take one of your little dough balls and gently roll out a little larger than palm sized. It needs to be large enough to hold ~2 Tablespoons of Char Siu mixture AND have enough clean dough on the edges to seal. Gently pinch around the edges (think accordion or dress pleats) until the bao has been sealed around the mixture. Give one final little twist and squeeze together your final pleat placing seam-side down on a piece of cut parchment. In Frisco we used to have edible paper, but cooking parchment works well here, if you don’t have parchment lightly grease your steamer with a tiny bit of vegetable oil and place sealed bao, seam-side down directly into the steamer.
Make sure to leave enough room inside the steamer for the bao to expand. Steam for 8 – 10 mins (at our altitude, probably 5 – 8 at sea level.)
Don’t they look delicious!
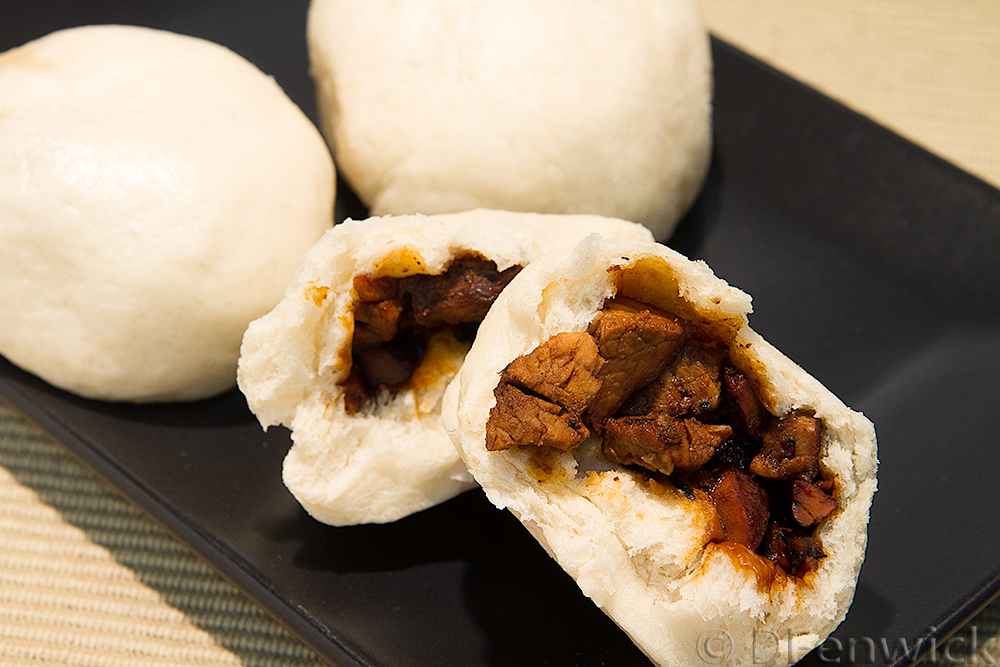
Cha Siu Bao
Part 3: Homemade Char Siu
Good homemade char siu will take about 24 hours and a bbq is best to get the crispy edges, but an oven broiler will do in a pinch.
So the day before you actually want to eat your Char Siu Bao get yourself some pork loin (we buy ours at Costco, this will produce a leaner product) or pork butt (if you don’t mind the fat). About a 1.5lbs will get you enough for this recipe but if you want some char siu leftovers for fried rice, etc, just adjust the marinade by a little bit as appropriate and add more meat. The pork should be cut into strips so you get that nice char around all the edges, the width of your first and second finger is a good guesstimate of the diameter they should be. Place the strips into a zip lock baggie then add this mixture, coating well:
2 Tablespoons Sesame Oil
2 Tablespoons Brown Sugar
3 Tablespoons Honey
3 Tablespoons Hoisin
3 Tablespoons Thick Soy Sauce
1/2 teaspoon Chinese Five Spice Powder (you can buy this in your regular grocery store, spice aisle)
1/2 teaspoon Garlic Powder
After a few hours rotate the meat around in the marinade. Do this a couple times prior to the time you are actually going to bbq it, which hopefully is at least a day later.
Barbecue the pork as you normally would until done, then let cool. We’re ready to mix the filling and fill the bao.