Adventures in Thyme

Our adventures in food

  • Home
  • Contact

Pecorino Crisps

January 7, 2015 by Ginger Leave a Comment

crisps

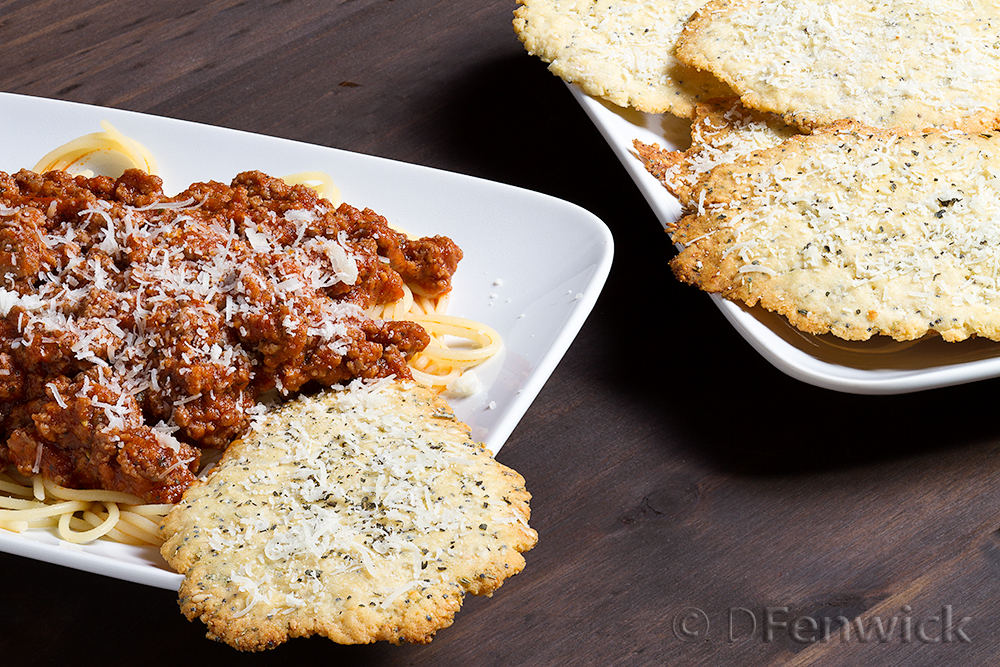
It’s been fairly cold in our neck of the woods and a big plate of spaghetti was calling to me, but I wanted something different than just a hunk o’garlic bread beside my plate.  So I tracked down this wonderful little recipe over at Pillsbury’s website called Herbs & Seeds Parmesan Crackers.

I altered the recipe to accommodate our wheat free, gluten free and bovine milk free household.  To do that I used Bob’s Red Mill Biscuit and Baking Mix which is wheat free, gluten free, and dairy free.  The texture is slightly grainy probably due to the bean flour, but it is delicious, and goes well with the silky gluten free rice pasta sold by Ronzoni.

Feel free to change out the herbs and seeds to better suit your palate!

2 Cups Bob’s Red Mill Biscuit and Baking Mix
1/4 teaspoon Garlic Powder
1 tablespoon crushed Rosemary
1 tablespoon Poppy Seeds
1 tablespoon Sesame Seeds
~ 1 cup of shredded Pecorino cheese
dried Basil
Sea Salt (we used pink Himalayan)

Place your baking sheet into the oven and preheat oven to 400F.

Prepare biscuit mix per instructions on back of the flour package.  You’ll then want to turn this mixture out onto a flat surface for it’s final mixing by hand with all your assorted sprinkles.  I covered my breadboard with a large sheet of freezer paper so I could keep the dough cold in the freezer while I did all the rolling & cooking of batches.  It also made moving the dough off the breadboard (to roll out the dough balls) much easier!

Sprinkle the garlic powder, rosemary, poppy seeds, sesame seeds and about half a cup of the pecorino over the dough.  Mix well by hand.  Now it’s time to roll out the crisps.  Note: My baking sheet is small so I rolled 3 crisps at a time, adjust your count by the equipment you have available.

Cover your breadboard with parchment paper.  Roll dough balls in your hand approximately 1-inch in diameter and place onto this parchment spaced out for easy rolling.  Now cover these dough balls with a 2nd sheet of parchment and roll out using a rolling pin, can of soup, or bottle of wine.  I rolled mine ~1/8 to 1/4 inch.

Remove the top sheet of parchment, place onto your baking sheet, prick crisps with a fork, place in the oven and bake, check them in about 8 mins.  If they are as crisp as you want, remove, sprinkle with basil, salt and more cheese.  Enjoy the yumminess!

Filed Under: Photo, Recipe

Taco Shell Bites

December 11, 2014 by Ginger Leave a Comment

Tacos made with shell pasta by D Fenwick http://dfenwickphotography.com

Taco Shells

With all the frantic holiday planning and preparations this time of year, it can be difficult to cook something “interesting” for a weekday dinner.  A study in 2009 found that the average cook relied on just nine recipes they rotate through, with fast recipes chosen more often over healthy ones.  Today’s recipe is one of our quick and easy mainstays, but with one little change: we’re replacing tortillas with pasta shells!  OMG this is good!  Let’s get cookin’!

1 lb ground meat (we used beef)
1 packet taco seasoning (we used Mild, but you can also find Spicy or Gluten Free at your grocers)
1 15 oz can of tomato puree
1/2 package of pasta shells
~2 cups of grated cheese (we used dairy free cheese in Monterey Jack and Cheddar flavors)
Salsa
Optional: sour cream, cilantro, green onions, hot sauce

Preheat your oven to 350 degrees F.  Prepare a 9×13 baking pan by spreading a thin coating of butter to keep the pasta from sticking.

While the beef is browning in a skillet, heat a pot of water to boiling for the pasta.  When the beef is done remove excess oil and add the Taco Seasoning but omit the water. Stir.  After the seasoning is incorporated add in the tomato puree and stir to combine evenly.  Once it begins to bubble remove from heat and set aside.

Cook your pasta until almost done (so on the chewier side of al dente), remember – you’re going to bake the shells later.  Once the pasta is ready pour into a sieve and cool with cold running water (your basically stopping the cooking process).

Now it’s time to combine all the parts:  Fill each shell with a tablespoon or two of the meat mixture then place into an even layer in the baking pan.  When all the shells are full, sprinkle the cheese over the top, then bake about 15-20 mins or until the cheese melts.

Serve topped with salsa, sour cream, cilantro, green onions, and/or hot sauce.

Enjoy!


Filed Under: Photo, Recipe Tagged With: Dinner, ground beef, Shell Pasta, Shells, taco

Shrimp Fondue

November 20, 2014 by Ginger Leave a Comment

fondue


There’s little on a cold blustery day more comforting than peering into a bubbling pot of cheesy goodness with something enticingly dippable in one’s hand.  Tonight we’re offering a simple, and delicious, bit of cheesy heaven.  Although a fondue pot is helpful (and a wonderful addition to your kitchen), you don’t need one for this recipe – any small pot will do.  Enjoy!

Into your fondue pot melt:

1 8-oz package of cream cheese (we use a dairy free variety due to a bovine milk intolerance in our house)
1 cup sour cream (again, we use a dairy free variety)
4 oz of pecorino cheese (a sheep milk cheese but you can substitute parmesan)
1 cup of marinara sauce
3 Tablespoons vodka
2 Tablespoons olive oil (garlic infused is really yummy)
Dippable suggestions: French bread; shrimp; lobster; crab; crudité.

The fondue pot will eventually bring this mixture to a boil and then keep it at a constant temperature for easy dip-ability.  If you’re using a stovetop pot, watch it carefully so as not to over boil or burn.  Be sure to stir regularly while this is heating so it doesn’t stick and burn.

We served our shrimp with capellini pasta as the fondue can easily be spooned over the pasta as a sauce.  Yum!


Filed Under: Photo, Recipe Tagged With: cheese, Dinner, fondue, shrimp

Wild Rice & Chicken Casserole

October 30, 2014 by Ginger Leave a Comment


Wild Rice and Chicken Casserole by D Fenwick, http://dfenwickphotography.com

Wild Rice and Chicken Casserole


The holidays loom before us; many are already planning the meals that will be shared with friends and family.  So today we’re offering a very customizable recipe that will benefit from holiday leftovers.  Tonight we’re using store bought ingredients, but I’ll notate where you can use those yummy leftovers to your advantage and the relief of your refrigerator.  Our best advice is as you stand in your kitchen channel your favorite Iron Chef and go for it!

Wild Rice & Chicken Casserole

Leg & Thigh meat from Roasted Chicken cut or pulled into small bite sized pieces (substitute: Turkey)
1 6 oz box Wild Rice mix, cooked (substitute: any rice with seasoning to taste)
1 10 oz package of broccoli florets (substitute: leftover crudité)
1 heaping teaspoon flour
1/2 cup chicken stock
1/2 cup almond milk (substitute: rice milk, milk, cream)
1/4 tsp rosemary
1/2 tsp thyme
1/2 tsp poultry seasoning
1 cup grated pecorino cheese (substitute: parmesan)
~3 pats of butter
optional: nuts (we used almonds but if you have walnuts that would work too)

We used a small convection oven set to 350 degrees and a casserole dish.  Use some of your butter to coat the inside of the casserole dish.  I use a sandwich sized zip baggie to hold a pat of butter and swirl around inside.  Whatever is left of the pat will be added to your dish later – no waste!

While the oven is warming up, into a small saucepan add the remaining butter pats, stock, milk, rosemary, thyme and poultry seasoning, bring to a simmer.  Remove from heat and whisk in flour.  Set aside.

In your casserole dish gently combine the chicken pieces, cooked rice and the broccoli, then pour the stock mixture over the top.  Sprinkle 1/2 the cheese over the top and add some nuts.  Loosely cover with aluminum foil and bake 30 mins.  Then remove the foil and bake an additional ~10 mins or until the top is browned.

Serve with a little extra cheese on the top.  Enjoy!


Filed Under: Photo, Recipe, Recipe Modifications Tagged With: casserole, chicken, Dinner, rice, wild rice

Pasta with Lamb

October 15, 2014 by Ginger 1 Comment


Lamb Meatballs by D Fenwick, http://dfenwickphotography.com

Lamb Meatballs

Today’s dish was actually difficult to name.  When one mentions “balls” these days, the conversation can quickly disintegrate into snickering akin to Beavis and Butthead, or be misinterpreted to a recipe involving lamb testicles, better known in Nevada as “lamb fries”.  So we will simply say that this dish involves Pasta with Lamb (tho you are in fact making round balls, let’s be clear – and let the giggling begin).  If you don’t like lamb, turkey would be a good substitute.  Use your imagination!  This is exactly what it’s for, and where our adventure begins…

Ingredients:

1lb ground lamb
1lb broccoli florets – cut into small “heads” or flowers
1 clove of garlic finely minced
1 small shallot finely minced
2 eggs
1/2 cup panko (or you could use breadcrumbs)
1 tsp salt
1 tsp dried rosemary
1/2 tsp thyme
1/2 tsp basil
1/3 cup almond milk (or you could use cream)
1 cup shredded pecorino (or parmesan)
crumbled goat cheese
extra virgin olive oil
1 lb cooked pasta (we used gluten free rotini, but any small noodle will do)
Optional: red pepper flakes

To a large skilled add a couple tablespoons of olive oil.  When the oil is hot, add the minced garlic and shallot, stirring continually until the shallot begins to be translucent (6-8 minutes).  Remove from heat and empty the skillet into a large mixing bowl (save this skillet for later, you’ll use it again).   While this mixture is cooling, add the salt, rosemary, thyme and basil.  Stir well.  Next add the lamb, one egg and panko to the bowl.  With clean hands mix this well, incorporating all the ingredients together, then begin rolling your balls.  Ours are slightly bigger than bite size, whatever size you prefer is what you should aim for.  Smaller will cook faster, fyi.  I roll the balls and place them back into my mixing bowl.  Yes, I have a large bowl and prefer fewer dirty dishes to clean up!

This next phase will require some forethought and a bit of juggling.  If you have larger balls, you’ll need to finish them off in a 450 degree oven for about 20 mins, if you have smaller balls, you won’t.  Depending on how you answered that question, will determine when you should begin cooking your pasta!  If you are going to use the oven, have your pot boiling when you place the balls into the oven; if you aren’t using the oven, time the cooking of the lamb, with the cooking pasta.  Make sense? You want everything done at the same time.  So cook your pasta when you’re good n’tooting ready!

Once your balls are ready to be cooked (and with clean hands), add a couple more tablespoons of olive oil to you skillet.  When it’s hot (and the balls will sizzle) carefully add them to your pan.  Depending on the size, you’ll need to turn them every 5-6 mins to get them uniformly brown.  *If* you made larger balls, now it’s time to put them into the prepared oven, (450 degree oven for about 20 mins.  I place mine into a parchment lined pan and cover with aluminum foil).

When the balls are done, return them to your original skillet (or just leave them in there) and add your broccoli.  As the broccoli cooks it will turn a beautiful deep green.  While this cooks whisk your egg and almond milk together in a small bowl. You don’t want to fry them crispy, just about 8 mins or so, if they begin to turn brown, it’s time to move on.  Add your drained pasta, mix well remove from the heat; quickly add your egg mixture and mix constantly (yes, you will get some cooked eggie bits), then add the shredded cheese.  Serve hot with crumbled goat cheese on the top and French bread with balsamic vinegar to dip in.

If you enjoy a little heat with your meal, sprinkle on red pepper flakes to taste.


Filed Under: Photo, Recipe Tagged With: Dinner, Lamb, meatballs, pasta

  • « Previous Page
  • 1
  • …
  • 4
  • 5
  • 6
  • 7
  • 8
  • …
  • 11
  • Next Page »

Recent Posts

  • Hard Cider Brittle
  • Jalapeno Artichoke Dip
  • Beef and Pasta in Red Sauce
  • Steak – One Pan Meal
  • Grain Free “Strawberry Shortcake” Cookies
  • Meatballs with options for everyone at your party
  • Chicken for game day
  • Spaghetti with sliced beef
  • Baked Salmon in Puff Pastry
  • Christmas Dessert for Two

ARCHIVES

  • November 2016
  • June 2016
  • May 2016
  • March 2016
  • February 2016
  • January 2016
  • December 2015
  • November 2015
  • October 2015
  • September 2015
  • August 2015
  • July 2015
  • June 2015
  • May 2015
  • April 2015
  • March 2015
  • February 2015
  • January 2015
  • December 2014
  • November 2014
  • October 2014
  • September 2014
  • August 2014
  • July 2014
  • June 2014
  • May 2014
  • April 2014
  • March 2014
  • February 2014
  • January 2014
  • December 2013
  • November 2013
  • October 2013

Categories

  • Cooking Information
  • Event
  • Photo
  • Recipe
  • Recipe Modifications
  • Restaurant

Meta

  • Log in
  • Entries feed
  • Comments feed
  • WordPress.org

Copyright © 2025 · Foodie Child Theme by Shay Bocks · Built on the Genesis Framework · Powered by WordPress