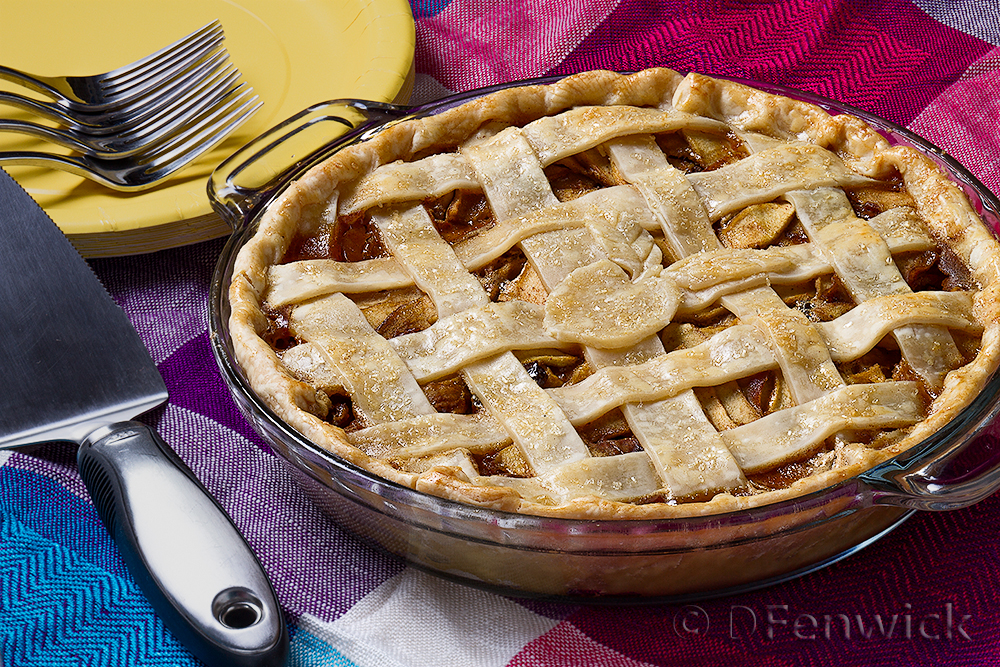
Adventures in Thyme

Our adventures in food

  • Home
  • Contact

Tartys In Applis

October 1, 2014 by Dan Leave a Comment

Tartys In Applis

Tartys In Applis

This week we’re going to tiptoe through time to days of yore for a yummy “Tartys In Applis”.

For To Make Tartys In Applis. Tak gode Applys and gode Spycis and Figys and reysons and Perys and wan they are wel ybrayed colourd wyth Safroun wel and do yt in a cofyn and do yt forth to bake wel. Source – Form od Cury, English 14th century.  (Try http://medieval cookery.com or google search for sites with assorted redactions.  This is a modification of the one on Medieval Cookery)

 How’d you do?  Get it?  No worries, back to the future we go…

5 cups chopped apples
1 cup chopped figs
½ cup raisins
1 tablespoon sugar
2 teaspoons cinnamon
½ teaspoon ginger
½ teaspoon nutmeg
¼ teaspoon cloves
2 crusts for a 9 inch pie
1 beaten egg (to brush crust)

Preheat your oven to 350 degrees.

Peel, core and dice the apples. I used a mix of sweet and tart apples.  Chop figs too.  Combine the apples, figs and raisins.  Add the sugar and spices mixing well.

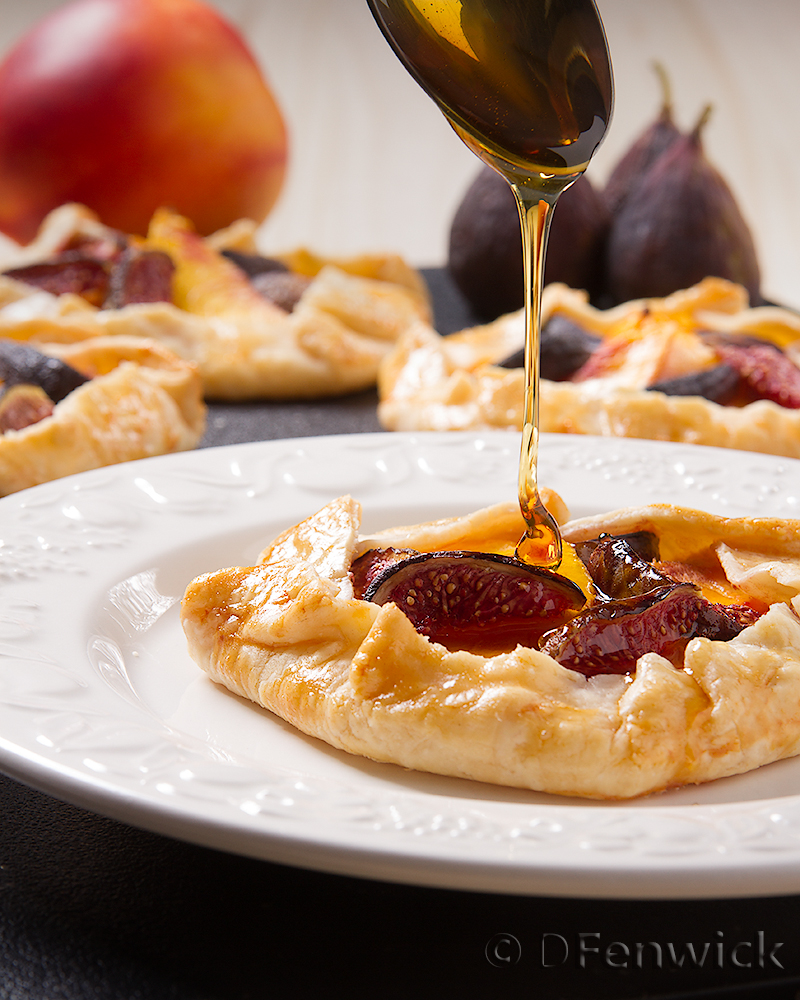
Lay out your pie crusts on a parchment paper covered baking sheet. Put half the mixture on each pie crust, leaving an inch to an inch and a half clear around the circumference.  Spread the filling so it is level.  Fold the edges of the crust up and over the edge of the filling.  Add apple slices to make a decorative pattern if you wish.

Brush the crust with beaten egg. Bake for 40 minutes or until golden brown.  Serve warm or cold.

Changes from the original; I left out the pears, as I have lots of apples on my tree. I also left out the saffron as it isn’t going to do much to color this without more liquid.

Filed Under: Photo, Recipe Tagged With: 14th century, apple, dessert, Tart, Tartys In Applis

Fried-Apple Pie

September 17, 2014 by Dan 1 Comment

Fried-Apple Pie by D Fenwick

Fried-Apple Pie


Fall is in the air and apples are proving gravity does exist and falling in great abundance so catch a few and make a delicious apple pie!

Ingredients:

6 medium to large, tart baking Apples
Butter
3 Eggs
1/2 cup Sugar
1 1/2 tablespoons Molasses
1 teaspoon Cinnamon
1/4 teaspoon Nutmeg
handful Raisins
1 to 2 tablespoons Raw Sugar
Pie crusts for a 9 inch pie

Instructions:

Peel and slice the apples. Fry the apple slices in a skillet with a pat or two of butter. I fried them about 2 apples worth at a time. You will need 4 cups of fried apples per pie.  When done, set aside and let the apples cool until they are warm, not hot.

While the apples cool, preheat your oven to 350 degrees F and begin to assemble the rest of the filling.

Beat two eggs. Add the sugar and molasses and stir until well combined. Add the cinnamon and nutmeg stirring to incorporate. Now add the raisins and stir. Add the fried apples. Toss to coat with the egg and sugar mixture.

Using a 9 inch pie pan place one pie crust in the bottom of the pan. Add your apple mixture. Add a top crust (if solid, slit to allow steam to escape.) Beat your remaining egg and brush the crust with the egg. Sprinkle with raw sugar.

Place the pie on the middle rack in the oven and bake 30-40 minutes, or until golden brown.

Serve warm with whipped cream or ice cream.

Now you can say you DO follow your Mom’s advice and eat an apple a day, okay there’s some sugar involved, and a wee bit of spice, but still – it’s fruit!

Filed Under: Photo, Recipe Tagged With: apple, dessert, fried apples, pie

Fig and Nectarine Tart

September 3, 2014 by Dan Leave a Comment

Fig and Nectarine Tart by D Fenwick, http://dfenwickphotography.com

Fig and Nectarine Tart

This week we have a simple dessert that takes advantage of late summer’s bounty – nectarines and figs.  It’s a simple tart that is not only delightful to look at but super yummy too!

1 large Nectarine
2 or 3 ripe Figs
6 ounces Chevre (if you want sweeter, use cream cheese) at room temperature
Pie Dough (homemade or from the grocery store)
1 Egg
Honey

Preheat your oven to 350 degrees F.

Peel and slice the nectarine into thin slices (for 4 tarts you will need about 20 slices).  Cut the figs into wedges (for 4 tarts you will need about 20 wedges).

Beat the egg until well blended.

Roll your pie dough into 6 inch circles. Onto a parchment covered baking sheet lay the circles of dough. Spread 1.5 ounces of chevre onto each circle, leaving about 1 inch of clean dough around the edges. Lay out your nectarine slices and fig wedges on the cheese. Now, carefully fold the clean edge up and over the fruit and cheese (see photo above).  Use a pastry brush and brush all of the exposed pie dough with the egg.

Place your baking sheet in the oven and back for 30-40 minutes or until the crust is golden brown.

Remove from the oven and allow to cool until they are warm. Drizzle with honey and serve immediately.

Filed Under: Photo, Recipe Tagged With: chevre, dessert, Fig, Nectarine, Tart

Strawberry Ice Cream

July 16, 2014 by Dan 1 Comment

Strawberry Ice Cream by D Fenwick, http://dfenwickphotography.com

Strawberry Ice Cream

Sometimes you just have to give in to your urges, and today we succumb to ice cream’s siren song.

Homemade ice cream has been made so much easier with “modern” ice cream makers.  Do you remember the ones we used way back when with rock salt, and hand cranked it?  Well, today we can use electric ice cream makers and have our ice cream in about 30 mins of churning.  So, let’s get cookin’!

4 cups Goat Milk or substitute 2 cups regular Whole Milk and 2 cups Half and Half
1 1/2 cups Sugar
6 fresh Egg Yolks
1 pound Strawberries
1 Vanilla Bean

Separate 6 eggs so you have 6 fresh yolks. (You can keep the egg whites for another project if you wish.) Beat the egg yolks in a bowl until smooth.

Hull the strawberries. Place 1/2 pound of strawberries and 1/4 cup of sugar into a blender and puree. Take the remaining half pound of strawberries and cut them into small pieces, add 1/4 cup of sugar, stir and refrigerate until ready to use.

Combine 2 cups of milk and 1 cup of sugar in 2 quart pot. Halve your vanilla bean and scrape out the seeds. Add the bean and the seeds to the milk mixture. Heat over low heat, stirring regularly, until the sugar is dissolved and milk begins to steam. Note: Do not leave milk on the stove unattended, if it boils over it can cause a fire.

Add half a cup to a cup of the milk mixture to the eggs, a little at a time. Whisk in the milk as you add it. Keep stirring and add only a little at a time. You want to temper the eggs, not make scrambled eggs. Once this is combined, add the egg mixture back into the hot milk, whisking to blend thoroughly. Cook until it begins the thicken and coats a spoon. Remove from the heat and pour through a strainer into a mixing bowl. Now add the remaining 2 cups of goat milk or 2 cups of half and half and then add the pureed strawberries. Blend well. Place the mixture in the refrigerator until chilled (a couple of hours at least.)

Once the mixture is cool, place in an ice cream maker and freeze per manufacturer’s directions. Once frozen, mix in the cut up strawberry pieces (do not add the juice, it will make the ice cream freeze strangely) and place in your freezer until firm.

For a variation, you can substitute any summer fruit for the strawberries.

Filed Under: Photo, Recipe Tagged With: dessert, ice cream, strawberry

Berry Filled White Cake

July 9, 2014 by Dan Leave a Comment

Berry filled white cake by D Fenwick, http://dfenwickphotography.com

Berry filled white cake

Doesn’t that picture look awesome!  A triumvirate of cakey goodness – three delicious layers of divinely concocted cake with fruit.  It’s healthy – seriously!  Look at the fruit, and of course there’s eggs, and milk and…  Just eat it – you’ll love it and not care about the calories.  Let’s get baking!

Berry Filled Cake

Cake

2 cups white Sugar
1 cup (2 sticks) Butter, at room temperature
4 Eggs
4 teaspoons Vanilla
3 cups all purpose Flour
4 teaspoons Baking Powder
1 1/2 cups Milk (we used goat)

Preheat your oven to 350 degrees. Line and flour 3 9 inch round cake pans.

Sift together your flour and baking powder. Set aside.

Cream butter and sugar in mixer. Add eggs, one at a time, beat each one in before adding the next. Add vanilla. Beat until blended in.

With your mixer at a lower setting (if you use a high setting you’ll have flour everywhere) add your dry ingredients, 1/4 at a time. Mix well. Add milk and mix until smooth. If it doesn’t look silky, add additional milk 1 tablespoon at a time, until batter is smooth. This batter is thick – be warned.

Put 1/3 of your batter into each pan. Spread so it is level and evenly distributed in the pans.

Bake at 350 degree F for 30 minutes. If a toothpick stuck in the middle of the cake comes out clean, remove from the oven. If not, cook another 5 minutes and check again. Repeat as needed. (Note: cooking times will vary depending on your oven.)

Cool the cakes for a few minutes, then turn out of the pans and cool on a rack until room temperature.


Strawberry Glaze

2 cups sliced Strawberries (fresh are definitely best – and they’re in season!)
1 cup Water
1 cup white Sugar
4 tablespoons Corn Starch

Combine sugar and water in 2 quart sauce pan. Heat over medium low heat, stirring occasionally until sugar dissolves completely. Turn heat down to low and add the strawberries. Cook, stirring gently, occasionally, until the juice from the strawberries is well incorporated into the syrup. (30 to 45 minutes.) Strain out the sliced strawberries and let the syrup cool to room temperature or so. Carefully mix in your corn starch so you have no lumps. Return the syrup to your pan and heat at medium high until it thickens and begins to bubble. Stir constantly. Once done, remove from heat and cool to room temperature.


Buttercream Frosting

4 sticks (2 cups) Butter
6 cups powdered Sugar
2 teaspoons vanilla
Milk

Cream your butter in your mixer until light and fluffy. Add the powdered sugar, carefully so you don’t get it all over the kitchen, and mix until blended and smooth. Add milk 1 tablespoon at a time until you get a spreadable consistency.


Berry Filling

2 cups sliced Strawberries
2 cups fresh blueberries (or raspberries / blueberries / insert favorite fruit here)
Strawberry Glaze (see above)

Combine your fruit with some of your strawberry glaze so that it coats the fruit.


Assemble your cake

First, make a paper template for the area you will be cutting out of your cake. (You will be removing the grey area in the picture.) Make the template to the ring has a 3 inch inside diameter and a 6 inch outside diameter. Place the template, centered, on one layer of your cake and carefully cut around the inside and outside of the template. The area you are removing is where the berry filling will go.

Layer template

Place a whole layer on your cake plate and cover the top with a layer of frosting. Add the center and outside rings from the layer you cut into rings above. Carefully add filling so that the fruit and glaze fills the ring. Now cover this layer, including the filling, with a layer of frosting. Place the remaining whole layer on top. Frost the cake with your remaining frosting. Serve in slices, topped with some of your remaining filling and extra glaze as desired.

Store in the refrigerator. Eat within a few days.

Filed Under: Photo, Recipe Tagged With: berry, blueberry, buttercream, buttercream frosting, cake, dessert, filled, strawberry, white cake

  • « Previous Page
  • 1
  • …
  • 4
  • 5
  • 6
  • 7
  • 8
  • Next Page »

Recent Posts

  • Hard Cider Brittle
  • Jalapeno Artichoke Dip
  • Beef and Pasta in Red Sauce
  • Steak – One Pan Meal
  • Grain Free “Strawberry Shortcake” Cookies
  • Meatballs with options for everyone at your party
  • Chicken for game day
  • Spaghetti with sliced beef
  • Baked Salmon in Puff Pastry
  • Christmas Dessert for Two

ARCHIVES

  • November 2016
  • June 2016
  • May 2016
  • March 2016
  • February 2016
  • January 2016
  • December 2015
  • November 2015
  • October 2015
  • September 2015
  • August 2015
  • July 2015
  • June 2015
  • May 2015
  • April 2015
  • March 2015
  • February 2015
  • January 2015
  • December 2014
  • November 2014
  • October 2014
  • September 2014
  • August 2014
  • July 2014
  • June 2014
  • May 2014
  • April 2014
  • March 2014
  • February 2014
  • January 2014
  • December 2013
  • November 2013
  • October 2013

Categories

  • Cooking Information
  • Event
  • Photo
  • Recipe
  • Recipe Modifications
  • Restaurant

Meta

  • Log in
  • Entries feed
  • Comments feed
  • WordPress.org

Copyright © 2025 · Foodie Child Theme by Shay Bocks · Built on the Genesis Framework · Powered by WordPress