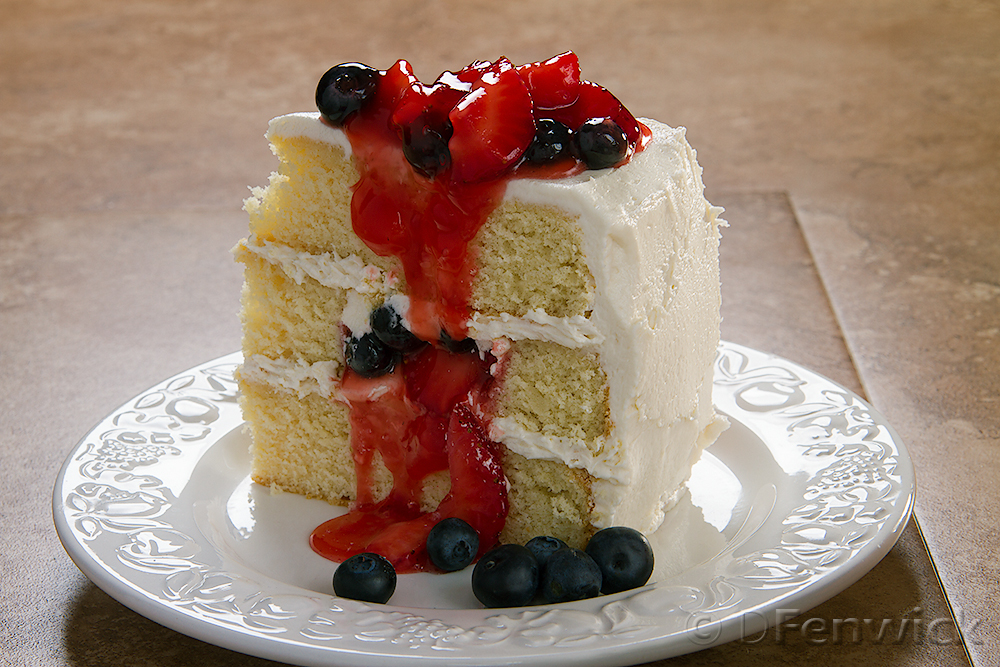
Berry filled white cake
Doesn’t that picture look awesome! A triumvirate of cakey goodness – three delicious layers of divinely concocted cake with fruit. It’s healthy – seriously! Look at the fruit, and of course there’s eggs, and milk and… Just eat it – you’ll love it and not care about the calories. Let’s get baking!
Berry Filled Cake
Cake
2 cups white Sugar
1 cup (2 sticks) Butter, at room temperature
4 Eggs
4 teaspoons Vanilla
3 cups all purpose Flour
4 teaspoons Baking Powder
1 1/2 cups Milk (we used goat)
Preheat your oven to 350 degrees. Line and flour 3 9 inch round cake pans.
Sift together your flour and baking powder. Set aside.
Cream butter and sugar in mixer. Add eggs, one at a time, beat each one in before adding the next. Add vanilla. Beat until blended in.
With your mixer at a lower setting (if you use a high setting you’ll have flour everywhere) add your dry ingredients, 1/4 at a time. Mix well. Add milk and mix until smooth. If it doesn’t look silky, add additional milk 1 tablespoon at a time, until batter is smooth. This batter is thick – be warned.
Put 1/3 of your batter into each pan. Spread so it is level and evenly distributed in the pans.
Bake at 350 degree F for 30 minutes. If a toothpick stuck in the middle of the cake comes out clean, remove from the oven. If not, cook another 5 minutes and check again. Repeat as needed. (Note: cooking times will vary depending on your oven.)
Cool the cakes for a few minutes, then turn out of the pans and cool on a rack until room temperature.
Strawberry Glaze
2 cups sliced Strawberries (fresh are definitely best – and they’re in season!)
1 cup Water
1 cup white Sugar
4 tablespoons Corn Starch
Combine sugar and water in 2 quart sauce pan. Heat over medium low heat, stirring occasionally until sugar dissolves completely. Turn heat down to low and add the strawberries. Cook, stirring gently, occasionally, until the juice from the strawberries is well incorporated into the syrup. (30 to 45 minutes.) Strain out the sliced strawberries and let the syrup cool to room temperature or so. Carefully mix in your corn starch so you have no lumps. Return the syrup to your pan and heat at medium high until it thickens and begins to bubble. Stir constantly. Once done, remove from heat and cool to room temperature.
Buttercream Frosting
4 sticks (2 cups) Butter
6 cups powdered Sugar
2 teaspoons vanilla
Milk
Cream your butter in your mixer until light and fluffy. Add the powdered sugar, carefully so you don’t get it all over the kitchen, and mix until blended and smooth. Add milk 1 tablespoon at a time until you get a spreadable consistency.
Berry Filling
2 cups sliced Strawberries
2 cups fresh blueberries (or raspberries / blueberries / insert favorite fruit here)
Strawberry Glaze (see above)
Combine your fruit with some of your strawberry glaze so that it coats the fruit.
Assemble your cake
First, make a paper template for the area you will be cutting out of your cake. (You will be removing the grey area in the picture.) Make the template to the ring has a 3 inch inside diameter and a 6 inch outside diameter. Place the template, centered, on one layer of your cake and carefully cut around the inside and outside of the template. The area you are removing is where the berry filling will go.

Place a whole layer on your cake plate and cover the top with a layer of frosting. Add the center and outside rings from the layer you cut into rings above. Carefully add filling so that the fruit and glaze fills the ring. Now cover this layer, including the filling, with a layer of frosting. Place the remaining whole layer on top. Frost the cake with your remaining frosting. Serve in slices, topped with some of your remaining filling and extra glaze as desired.
Store in the refrigerator. Eat within a few days.